Loving Laundry

I’ve said before in this blog that there is no rhyme or reason to how I choose renovation projects, I just work on what’s annoying me the most. Lately, it has been my laundry room. It’s right off the kitchen so I see it every time I go in or out of the house, not to mention the too many hours spent doing laundry. When we bought the house the washer and drier hookups were in the basement, which is scary. Off the kitchen we had a narrow pantry with old rickety shelves. Next to it was a huge half bath, which was oddly large and had an entrance off the kitchen. We closed off the kitchen entry to the bathroom, made the half bath a normal size with an entrance off the family room and enlarged the pantry to be a big laundry room.  While I loved having the laundry off the kitchen, the room was very unfinished.

I had a Pinterest board of ideas for laundry rooms, but nothing seemed to spur me to action until I read The Life-Changing Magic of Tidying Up. I didn’t enjoy the book, but in my subconscious something must have taken hold because over the past few weeks I have systematically worked my way through every closet and dresser in the house and then attacked the kitchen cabinets.

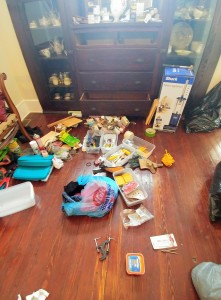
I purged and then organized what was left, which frankly wasn’t much because I was way more focused on purging than organizing. As every member of my family said at one point, “You’re not giving away MY stuff are you?” (Yes.) The one take away I had from the book is that we hold on to way too much stuff thinking we will have a need for it “someday.” If that someday ever comes, chances are we can’t find the item we need in the mounds of stuff we own and we have to buy a new one anyway. This is the purge of the downstairs buffet which was filled with construction materials which are now in the basement in neatly labeled totes. Now the buffet holds plates, as it was intended to.

2 18 8

Did I mention I bought a label maker as part of this rehauling of all of our possessions?  Things are now labeled which clearly do not need to be.

2 18 2

Finally the day came when the entire house had been purged (except the basement, which is too scary to be considered part of the house.) All that was left was the laundry room. This was no insignificant task since the laundry room was the storage area for a ton of construction and paint supplies, not to mention a million hats, gloves, and winter coats. I started by cleaning it out, finishing the baseboards, put up new shelving, and enclosed the washer and drier. This task was made easier by my new circular saw with a laser light. I requested this new saw for Christmas since it is much smaller and lighter than the one I had. I rarely used my old one since I was pretty sure I would lose a limb. The final task was organizing the shelves so I can now see things and I can find what I need. And yes, I labeled things. I also installed useful items like a rack to hang clothes so my husband won’t drape clothes over the kitchen chairs. And then leave them there.

2 18 52 18 4

I have been so happy with my new laundry room that I just stand in the doorway and look in several times a day. Quite a change from when it was the room I avoided most!

2 18 62 18 32 18 1

Crown Molding…..At Last

When we bought our old house there was crown molding in the front rooms, most likely from the 1917 renovation.
crown4
As we were doing the demo on the house we had the contractor store the crown molding in the basement. Our thought was that in no time flat we would have the drywall in, the walls would be painted, and the old crown molding would go back up. Fast forward two years and finally, finally, the crown molding is being re-installed. When I painted the walls I left the tops unpainted since I knew the crown was going back in. This prompted over 18 months of questions from family and friends who wondered why I hadn’t finished painting. One thing this renovation has taught me is to never do unnecessary work, so there was no way I was spending the time to paint the tops of those walls when I knew it would be covered up. So we lived with this:
crown1

The first step in putting the crown back up was to remove the gigantic nails that were originally used to put the crown molding up. This required a bolt cutter since pulling them out would break the wood. It was actually kind of amazing to see the hand hewn angles for the corners and imagine how long trim work used to take before power tools like miter saws were invented. Then I had to clean years and years of grime off the wood before we carried it upstairs for the carpenter.

Once we held the crown up it didn’t look as impressive as I remembered. Maybe because at one time it was the nicest thing in the room. We decided that it needed a little…enhancement. So the old crown went up, and a new piece went under it. Then I decided it STILL needed more enhancement so a piece of dentil molding went on, along with a piece of quarter round on the bottom.

crown3

Now, I am happy. Well, until I get to spend days of my life painting all this crown molding. And, of course, my husband has now decided the living room is one shade too light and now that he looks at it, maybe, just maybe, the ceiling should be a different shade….

crown2

We’re on This Old House!

Imagine my surpise to wake up to a Facebook notification that our upstairs bathroom was featured on MSN.com and on the This Old House website!  I submitted before and after photos to the This Old House renovation contest several months ago.  I had no idea we were selected as a national finalist for the best budget redo.  As you can imagine, I spend a lot of time on their website and also read the This Old House magazine cover to cover.  I think I started watching their original tv show over 30 years ago and their influence was probably what led me into a wayward life of house renovating.

I chose the bathroom since we are in no way ready to enter the whole house renovation category and the bathroom is the only truly finished room in the house.  Which is, frankly, depressing.  The kitchen is very close, but I still need to do the backsplash, so the bathroom was chosen as our entry.

After two years of working away at a whole house renovation, it is so incredibly wonderful to receive national recognition for all of our hard work.  We are nowhere near finished, but this does give me some encouragement to keep working!


thisoldhouse1

Flowers, flowers, and more flowers.

If you have driven by our house lately you have seen a whole lot of flowers!  We were finally able to have the landscape guy out (Drew Miller, whom I highly recommend) to dig out all of the beds around the house.  At long last, we could plant landscaping.  Since it was so far into summer all the plants were on sale, so I may have gone a little crazy with the shrubs and flowers. 
yard7

Here is what the yard looked like when we bought the house – a real mess.  There was nothing to do except tear everything out, since it seemed to be mainly poison ivy.  We also had to replace all of the concrete walks and the concrete front porch.

IMG_3106

IMG_3127IMG_3126IMG_3116IMG_3111IMG_3107

After the beds were dug, the loooong planting process started.  We have the front and sides finished, and are still working on the beds in back.

yard1

yard2

yard5yard6

yard8

I may have gone a little overboard with the flowers this year, but we have a real yard now!  I think I am closing in on a painter to do the exterior paint, so by the end of summer we may have a fairly finished exterior.

The only downside to the landscaping has been that I learned the hard way that digging up poison ivy is not enough.  The oil is still in the soil, even after a year.  I was happily digging away in soil on the north side of the house that used to be full of poison ivy and I got the worst case ever.  Head to toe. I am now avoiding that side of the house because I definitely do not want another case of poison ivy!

The windowboxes of doom

house exteriro
When we bought our old house, my favorite part was the big front porch, and the windowboxes on the front windows. Of course, like everything else, the windowboxes were rotted through and had to be thrown away. This summer I built new windowboxes – they are nearly 10 feet long and very heavy. Over Mother’s Day weekend my oldest daughter and I planted tons of flowers in the windowboxes, and the other planters on the front porch.
house wb 5

The huge windowboxes are insanely heavy, but getting the bottom windowbox up was no problem. However, the second floor windowbox posed a slight problem. At nearly 10 feet long, there was no was it would make it up the interior stairs, and around the corner to the master bedroom. That meant it need to be installed from the outside. Many plans were put forward and rejected, leading my husband to name them “the windowboxes of doom” since he was convinced someone was going to get killed getting the second floor windowbox installed. I finally decided that when my oldest daughter and son-in-law visited for Turtle Days that we would all work together to get the windowbox installed. Be careful if you visit me, because there is a very good chance you will be put to work!

The plan I decided on was to tie rope around two sections of the windowbox and have my husband and son-in-law hanging out the upstairs windows pulling the rope. My 15 year old son and I would lift the windowbox up as high as we could, the men above would start pulling it up, and I would run upstairs and take my place in the middle window and guide the windowbox into place. This was slightly tricky as the supports really got in the way, and pulling a large, extremely heavy object straight up with a small rope, is a whole lot harder than it looks. Even my hugely pregnant daughter was put to work, taking pictures. I figured either the pictures would be used for this blog, or to show the surgeon who was trying to put one of us back together. My plan did work, although for a few tense seconds, it did seem possible that the entire windowbox would go crashing onto the ground. Luckily, my son-in-law is a lot stronger than he looks and manhandled the thing up and into place.

IMG_6261

IMG_6269
IMG_6275

IMG_6279

house wb 1

house wb 2

house wb 3

house wb 4

The good news is that the windowbox was in place for the Turtle Days parade that went right by the house! Now I just need to get the shutters made…..

Finished! The Upstairs Bathroom

When we bought this house I was pretty confident I could make it livable, but the one and only full bathroom gave me, well…nightmares. It was a 50s monstrosity that looked like it belonged in a horror movie. It was so bad, few people would actually enter it, they just looked on in shock from the hallway. Aside from being a general disaster area, the bathroom had a bad layout and no room for both a shower unit and a freestanding tub.

9335708354_cf3fb482c2_z

9379370318_da3b8e4cb1_z

9379372146_5aceb42a54_z

9379373132_83762ccc5f_z

After we gutted the bathroom, along with the rest of the house, we knocked out a closet to expand the bathroom and make room for two sinks, along with a shower and tub. I found a vintage looking tile for the floor, and in doing so discovered the joy ride that is black grout. I thought about doing a vanity with two sinks, but I really wanted the bathroom to look like it could have when the house was nice. Plus, I love the look of furniture in an old bathroom, instead of a modern vanity. Luckily, at the Wood Shack I found a small dresser that fit perfectly. The shelf above the tub and the wood with the hooks for the towels are also from the Wood Shack.

I showed my husband the “after” pictures and said, “Now, if you saw these pictures, wouldn’t you want to live in this house?” “Sure,” he said, “until you told me it was the ONLY finished room in the house.” Sigh…..

20150118_131740

20150118_131808

20150118_131753

20150118_131827

Finally…..a post!

Yes, I know it has been a loooong time since I made a post.  I had to take my qualifying exams for my doctoral program and that took up all of my time, for the past few months.  However, the house has been slowly moving along during that time.  We have internet and cable TV!  Amazing how internet makes a house feel like a home.  What we don’t have is enough electricity to move in.  We have a temporary 110 line running into the house, which is enough to run the fridge and any power tools we are using.  It is not enough to run all that plus the hot water heater.  I am pretty sure living in a house without hot water is not something anyone in this family wants to do.  Two months ago we paid over $1,100 to the electric company to come in and run our new line and bury it.  Several times we have been told we were on the schedule, but when we get to the house….no new line.  Our next installation date is tomorrow, but with the storm that just went through, I am not hopeful.

One big exciting development has been the new concrete work.  In the back of the house we had our new walkway and stairs installed, all the old asphalt parking pad taken out, and the slab taken out that ran along the back of the house.  We have way more yard space now, but no more grass!  We have also had the side porch taken out since we took out the entry door on the side of the house.  When we bought the house it had 5 exterior doors, and now we just have a front and a back door, which makes the house feel more like a house, and less like the doctor’s office that it was for many years.  Plus, just try to install kitchen cabinets in a room with 3 exterior doors!  The giant pile of crushed stone in the back yard that has been there for nearly a year is gone, as is all the wood the concrete guys had left to use as forms.  

houseconcrete6houseconcrete5

In the front of the house, we had the front stairs poured and the walkway from the sidewalk to the house installed.  Having front stairs means we can get mail!  Since we have owned the house we have either had a crumbling front walkway, or no walkway at all, so being able to walk right up to the front door is pretty cool.  It does, however, make the sidewalk on the street in front of the house look terrible.  We have plans to replace it, but have to wait until the road repaving in front of the house is finished because there is a chance they would damage it.

Here are some before pictures of the old concrete – it’s hard to believe how bad the house was when we bought it.  What were we thinking?  The old front walkway had brick walls and concrete tops.  Unfortunately, all but one of the tops was destroyed beyond saving.  Someday I would like to put back those brick walls and tops, but right now we just need functional stairs.

Trim and baseboard is being installed in the house and I bought two old columns from the Wood Shack off one of the buildings being torn down to make room for the huge Ash project downtown.  I will be installing them between the kitchen and dining room – nice to be able to save something from an old building.

Yesterday we went to work on the house and also attended the 100th birthday party for the Churubusco Library.  It’s just about a block away from the house and I look forward to taking the kids there.  They had a cake, so the kids were all excited!  houseconcrete7